Zoho Campaign Setup Guide Step-by-Step
Whether you’re new to email marketing or looking to improve your strategies, Zoho Campaigns is a powerful tool that helps you easily create and manage email campaigns. Email marketing is crucial for every business. Zoho Campaigns allows you to send targeted messages to your subscribers, track their engagement, and analyse the results.
This blog will walk you through everything you need to know about Zoho Campaigns, from setting up your account and growing your email list to designing attractive emails and understanding how well your campaigns are performing.
By the end of this guide, you’ll have the skills to use Zoho Campaigns effectively and boost your marketing efforts but if you are confused you can get help from the experienced Zoho CRM Consultant.
What is the Zoho Campaign?
Zoho Campaigns is an all-in-one marketing software made for companies of all scales, providing email and text messaging marketing options. It offers a variety of capabilities such as managing topics and lists, automation, and comprehensive report monitoring.
Key Features of Zoho Campaigns
- Real-time analytics
- Email Campaigns
- A/B testing
- Workflow automation
- Third-Party Integration
- Social Media Campaigns
Sign up for your Zoho Account
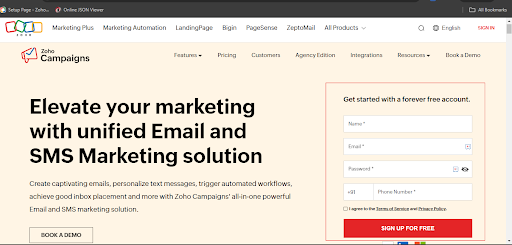
To begin using Zoho Campaign, the first step is to create an account on Zoho. Once your information is entered, you’ll proceed to the Zoho Campaign Page.
I. Know your Zoho Campaign Account
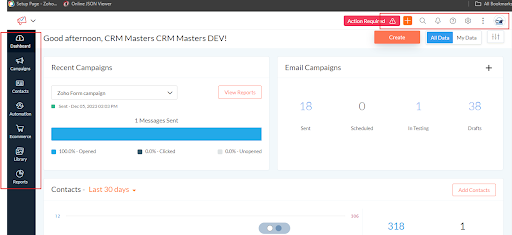
On the right-hand side of the dashboard, you will find various image icons, each representing a different function. These icons include Account, Help Center, Notifications, Calendar, Folders, and Favourites.
To the left of the Zoho campaign, you’ll see two picture icons right next to the Campaigns button.
Press the “+” button to swiftly make anything in your account.
By clicking the ‘+’ icon, you can easily start a campaign, SMS, autoresponder, and more.
On the left-hand side, you will find:-
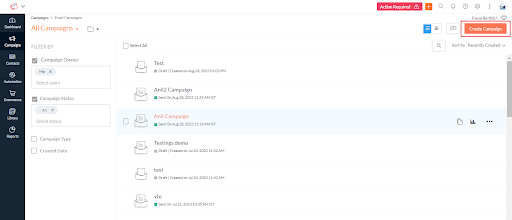
1. Campaigns
By selecting Campaigns, you have the option to develop email, social, and SMS campaigns. You’re able to post content on LinkedIn, Twitter, and Facebook through your Zoho Social Campaigns. Additionally, by initiating SMS Campaigns, you can participate in SMS marketing activities.
2. Contacts
On contacts, you can create your email list and manage your segments and contacts. You can also create a Signup form and manage your contact tags.
3. Automation
Here, you can establish Automated Responders and processes, which are both email sequences.
4. E-commerce
If you operate an e-commerce platform, you have the option to link it with Zoho Campaigns. By doing so, you will be able to enhance your email marketing strategies for improving sales, managing products left in shopping carts, and enticing your customers to return to your store via email campaigns.
5. Library
Here, you can handle everything from your content, like images, Email templates, workflow templates, and form templates, to attachments.
6. Reports
Here, you can conveniently access key analytics related to your email marketing efforts and monitor different metrics and key performance indicators to make an informed choice based on data.
II. How to Create an Email List
- Scroll to the top and tap on Contacts
- Choose the lists from the drop-down menu
- Go to the top right-hand corner and click on ‘Create list.’
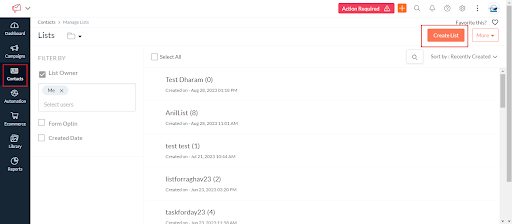
- Type in the name of your first list next to ‘Name’.

- Enter the name of the list that your list leads, customers, newsletter, or subscribers. Click ‘Save’.
- Now, add contacts to your new email list. You have two options for adding contacts.
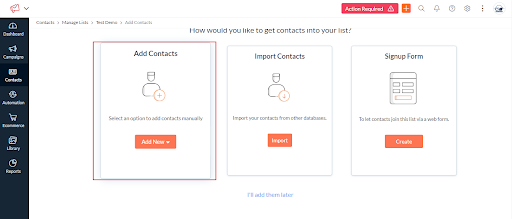
Select ‘Add Contacts’ to manually add your contact. – Alternatively, select ‘Import Contacts’ to import your contacts if you already have a list of contacts.
Once you’ve added your contacts:
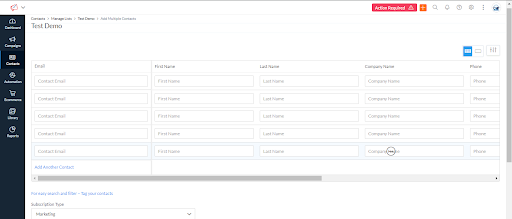
Click on ‘Multiple Fields’ at the right end of the page by the three icons, then choose this option. If you only want email addresses, select ‘Email Address Only‘. Click ‘Organize Columns’ to arrange your data. Click ‘Create Campaign’ to start a campaign. Hover over ‘Create Campaign’ and click the three dots for more options. List.
III. How to Create Segments
Segments facilitate the organization of contacts within your email list.
To create Segments:-
- Return to the “Contacts” section located on the left-hand sidebar.
- Click Segments
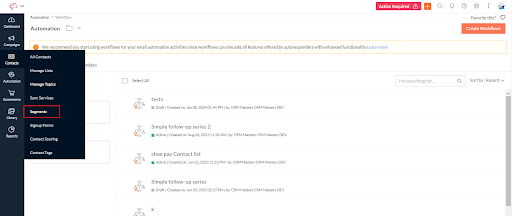
- Navigate to the “Create a Segment” section.
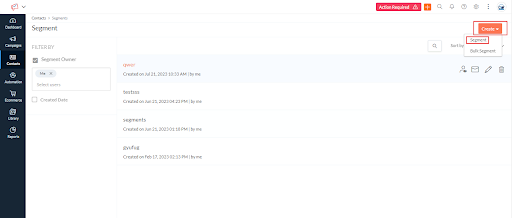
- Once you have access to this area, you will encounter various options such as Name and Criteria.
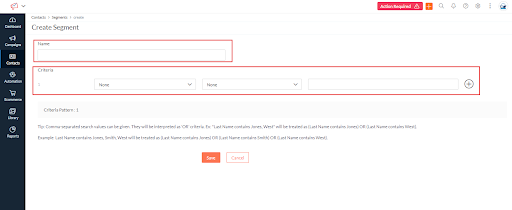
- You are then prompted to add your details, which will be integrated into this segment.
- Upon completion, you will find the option to “Save As” displayed, illustrating the criteria for contacts to be included in this segment.
You can add multiple segments if you prefer, depending on the nature of your business and how you wish to categorize your contacts within your email list.
IV. How to Create Signup Forms
Once you’ve added your segments, you can create a signup form.
- Navigate back to ‘Contacts’ and then move to ‘Manage Lists’.
- Next, navigate to ‘Signup Forms’ and click on it.
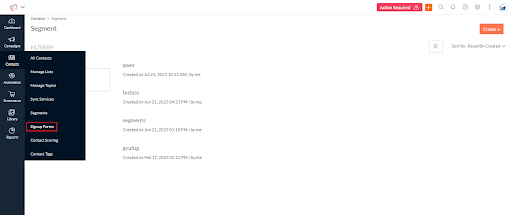
- Choose ‘Create Sign Up Form’.

- Type in a name for your new form using the pencil icon at the top of the page.
![]()
- Note that this form is linked to the email list ‘Subscribers’, which means that any contacts who sign up through this form will be added to our ‘Subscribers’ email list.
- To change this, simply click on the pencil icon next to your email list name.
- Next, you can navigate down to ‘Choose Template’ to select the type of sign-up form you want to create.
V. How to Create an Email Campaign
Click on the “Campaigns” section in the sidebar on the left.
- Click on “Create Campaign”
- Select Regular Email
- Add a campaign name to differentiate it from the others. If your account is only assigned the default topic, you can directly click Save and Proceed.
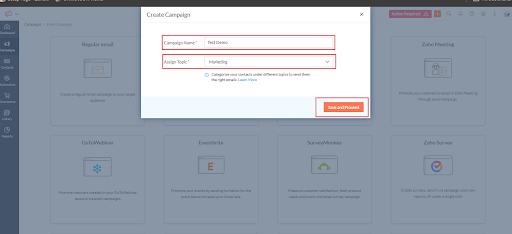
- If not, you must select a topic, then click save and proceed.
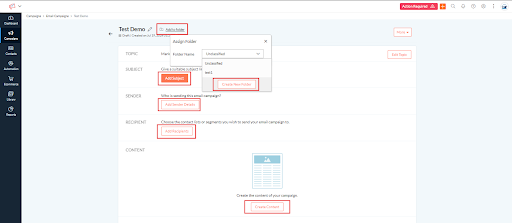
- To change your campaign’s name, simply click the Edit icon in the top-left corner. If you wish to add the campaign to a specific folder, click Add to Folder.
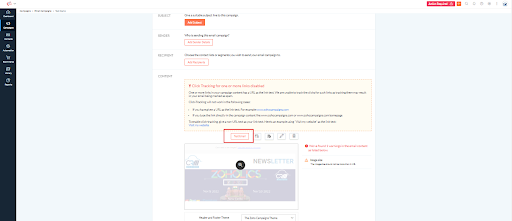
- For the subject line and pre-header text of your email, click Add Subject and enter the corresponding details, then click Save.
- To enter the sender’s name for your email, click Add Sender Details and fill in the necessary information.
- If you’d like to enable reply tracking, click Show Reply-to Details and specify a reply-to address. This step will also save your changes.
- To select the contacts who will receive your email campaign, click Add Recipients. Choose between mailing lists or segments, then proceed to Save.
- To exclude specific contacts from receiving the campaign, click Exclude Contacts.
- Choose contacts either by selecting a campaign they have previously received or by their inclusion in a particular mailing list, then click Save.

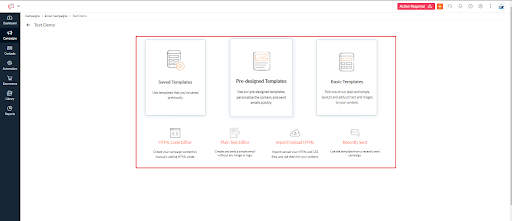
Choose a template from one of the options provided:
- Saved Templates
- Pre-designed Templates
- Basic Templates
Furthermore, you may opt to incorporate content sourced from:
- HTML Code Editor
- Plain Text Editor
- Import / Upload HTML
- Recently Sent
- Add your content and proceed. Additionally, you have the opportunity to preview and test your email campaign.
- You may proceed to send a test email to observe the appearance of the message within the recipients’ inbox. Please proceed to click Send test email.
- Select the email addresses you wish to send your test email to. You may select a maximum of 5 email addresses and proceed to click the “Send Test Email” button.
- To observe the appearance of your email on various email clients and devices, please proceed to the Inbox Preview feature.
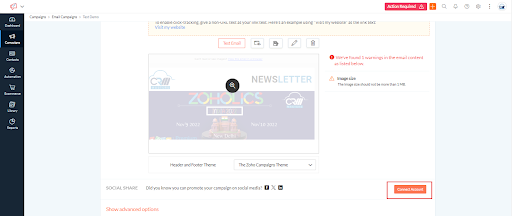
- To introduce a header and footer within your Campaign, select “Change” from the menu.
To advertise your email campaign across different social media sites, follow these steps:
1. Click on Connect Account.
2. Choose the social media platform of your choice to advertise your campaign.
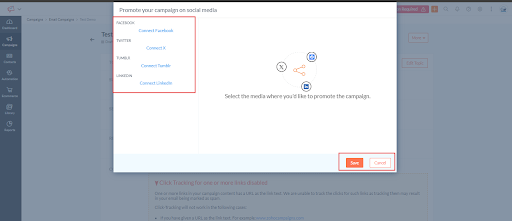
3. Save your selection.
4. Go to Show Advanced Options.
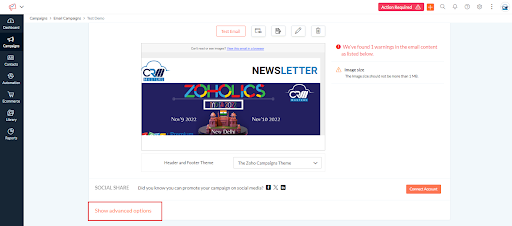
5. Now set up tracking, Integration, Contact scoring scheduling, and much more for your email campaign.
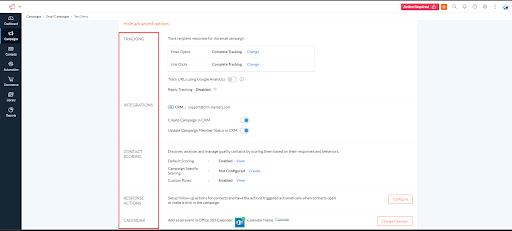
You can choose to track plain text URLs, track URLs using Google Analytics, and track video views in Wistia. Just enable the toggle button to start tracking.
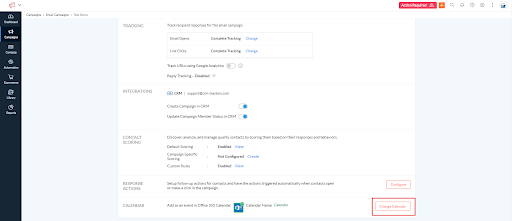
![]()
- Select Configure to include this campaign in your Office 365 Calendar.
- Choose Review and Launch to forward your email campaign for review, and it will be dispatched immediately following the review process.

- You also have the option to dispatch the campaign at a later time.
VI. How to Use A/B Testing
A/B testing in Zoho Campaigns allows you to test two different versions of an email campaign to determine which one performs better before sending it to your full audience. This helps you make data-backed decisions and continuously improve your email engagement.
To run an A/B test:
- Click on “Campaigns” in the left-hand sidebar and then click “Create Campaign”.
- Select “A/B Test” as your campaign type.
- Add a campaign name and select the topic, then click Save and Proceed.
- Create two versions of your campaign. You can test different subject lines, sender names, or email content between Version A and Version B.
- Set the test criteria, including what percentage of your audience will receive each version and how the winner will be determined. You can choose the winning version based on open rate, click rate, or manually after reviewing results.
- Define the time period for the test after which Zoho Campaigns will automatically send the winning version to the remainder of your list.
- Add your recipients, design the content for both versions, and click Review and Launch.
A/B testing is a straightforward way to refine your messaging and ensure your audience receives the content that resonates most with them.
VII. How to Set Up Multi-User Access and Roles
Zoho Campaigns allows multiple users to access a single account, making it easy for your team to collaborate on email campaigns. You can assign custom roles and set privileges to control what each team member can see and do within the account.
To add users and manage roles:
- Go to the top-right corner of your dashboard and click on your Account icon.
- Navigate to “Users and Roles” from the account settings menu.
- Click “Invite User” and enter the email address of the team member you want to add.
- Assign a role to the user. Zoho Campaigns offers predefined roles such as Administrator, Campaign Manager, and Content Creator. Each role comes with a specific set of permissions.
- If you need more granular control, you can create a custom role by clicking “Add Role”, naming it, and selecting the exact permissions you want to grant.
- Once a role is assigned, click Send Invite. The user will receive an email to join the account.
- You can manage existing users at any time from the same Users and Roles section, including editing their roles or removing their access.
Managing user access ensures your campaigns are handled securely, with the right people having the right level of control over your email marketing activities.
VIII. How to Set Up Third-Party Integrations
Zoho Campaigns connects with a wide range of platforms, allowing you to sync your contacts, data, and workflows across the tools your business already uses.
To set up an integration:
- Click on the Settings icon from your Zoho Campaigns dashboard.
- Navigate to “Integrations” from the settings menu.
- Browse through the available integrations and select the platform you want to connect.
Zoho Campaigns integrates with the following platforms:
Zoho Suite: Zoho CRM, Zoho Bigin, Zoho Commerce, and more. These native integrations let you sync contacts, automate workflows, and align your sales and marketing efforts seamlessly.
CRM Platforms: Salesforce, HubSpot, Microsoft Dynamics 365, Sugar CRM. Syncing these with Zoho Campaigns keeps your subscriber lists up to date based on your CRM data.
Event and Productivity Tools: G Suite and Eventbrite. You can import contacts from these platforms directly into your mailing lists.
To complete an integration:
- Click “Connect” next to the platform you want to integrate.
- Log in with your credentials for that platform and authorize the connection.
- Configure the sync settings, such as which contact lists or CRM fields to map.
- Save the integration. Zoho Campaigns will now sync data automatically based on your settings.
Integrating Zoho Campaigns with your existing tools ensures your contact data stays current and your marketing efforts remain coordinated across platforms.
Conclusion
Using this step-by-step guide to Zoho Campaigns, you can achieve a comprehensive roadmap for mastering email marketing for your business success. You will be able to create impactful campaigns, engage audiences, and automate workflows that drive results. Implementing these practices will enhance your email marketing efforts and help you connect more effectively with your customers and achieve your business objectives.
Need help with Zoho Campaigns?
CRM Master’s Infotech is a certified Zoho Partner that assists you with any issues you may face in Zoho Campaigns. Contact us today for expert guidance and personalized solutions!