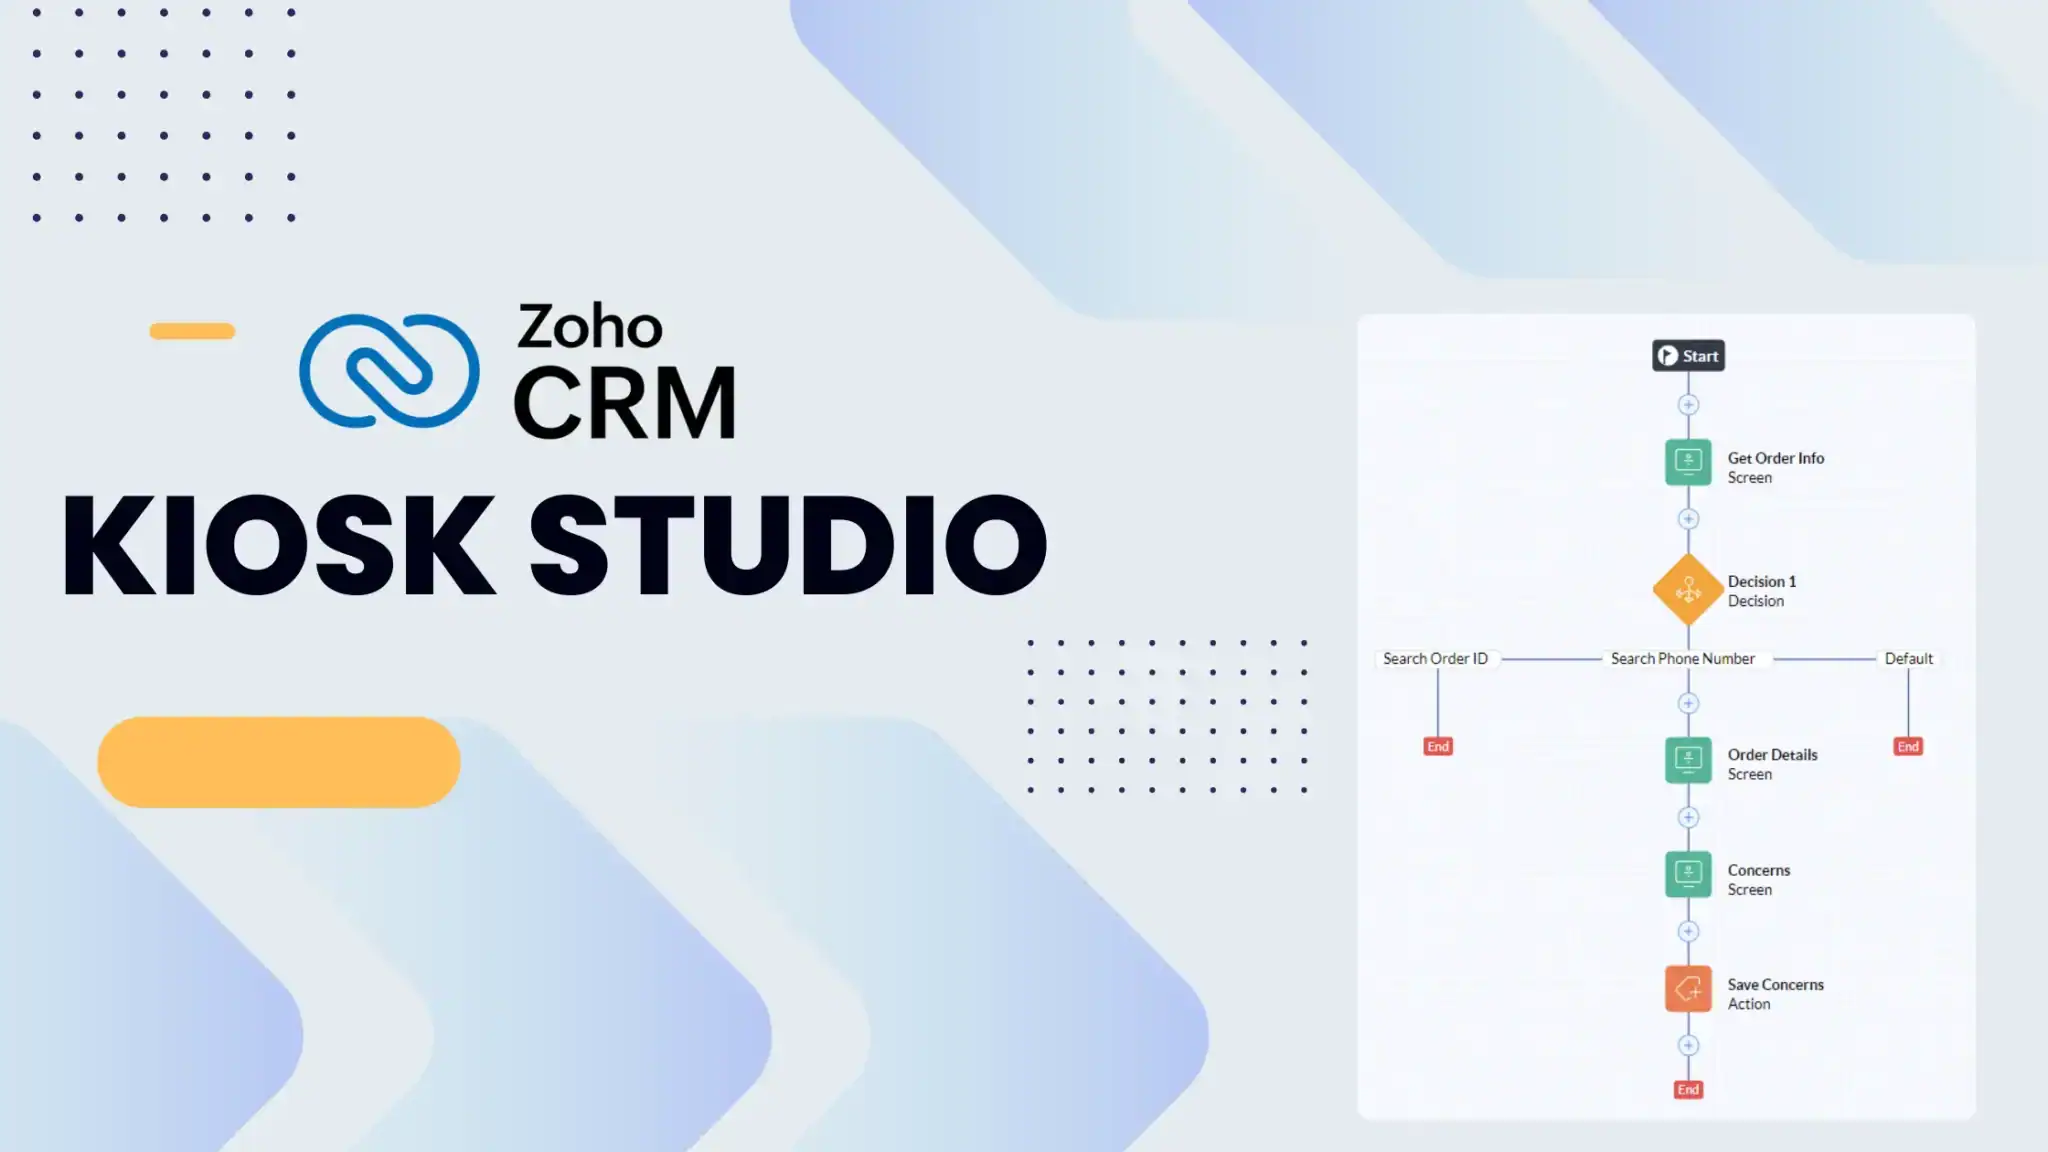
Kiosk Studio: Step-by-Step Guide
Zoho introduced a Kiosk studio within Zoho CRM, which has developed a design that streamlines and simplifies different tasks without being dependent on specific records. Unlike designs that activate processes based on certain records, kiosks function on their own, offering a high level of flexibility. This capability is especially useful for activities that involve user engagement, like directly adding new deals to the pipeline from the CRM homepage dashboard.
What is Kiosk Studio?
Kiosk Studio is a user-friendly no-code customization platform within Zoho CRM that enables administrators to make tasks easier for their users, clients, and suppliers by developing and integrating unique features known as kiosks throughout the CRM.
Elements of Kiosk
A kiosk consists of several fundamental components known as Screen, Decision, and Action, which are incorporated, set up, and linked in various manners.
1) Screen
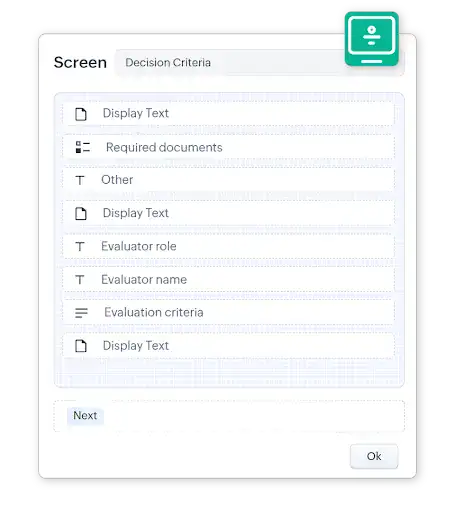
A screen shows the user information, data from the CRM, data gathered from earlier screens, and options to proceed. Every option acts as a pathway in the kiosk’s process. The information filled out in a screen’s fields and the data retrieved from the CRM are accessible for use in the next screens.
2) Decision
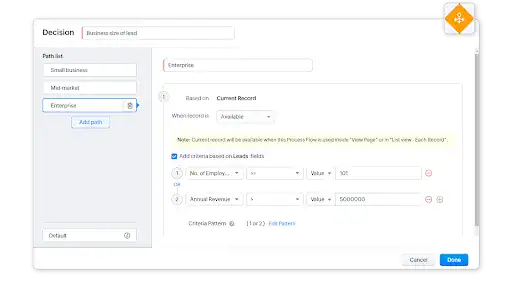
A decision element branches off the kiosk’s process according to current CRM information or the data from the prior fields on the screen. It acts as an alternative to the buttons present on the screens. While both elements determine the flow’s path, decision elements accomplish this task automatically, relying on the data. A set of criteria is outlined to determine which path the flow should follow.
3) Actions
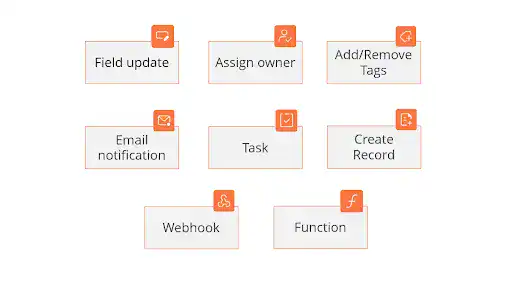
Actions play a pivotal role in connecting the data displayed on the screen with the broader CRM system. When actions are added to a specific branch of the kiosk, they will be automatically triggered if the user’s actions navigate to that branch. By creating an action, you have the flexibility to leverage the data collected from previous screens. For instance, the information provided by the user in earlier screens can serve as the values for the arguments of a function.
There are different actions available like update, assign, owner, tagging records, notifications, activities, records, and executing webhooks or functions.
Benefits of Kiosk Studio
- Create your special features for your business situations with an easy-to-use no-code platform. Get rid of the requirement for coding work, and reduce time, materials, and money.
- Collect all essential information for your kiosk from any section in your CRM. Retrieve the data you require without the need to manually navigate through every section.
- Utilize a variety of custom UI elements such as screens, fields, and buttons. Expand the range of functionalities you can develop to meet specific business requirements.
- Place your kiosks on various pages like the record detail page, list page, or homepage.
How to Start a Kiosk Studio in Zoho CRM
I) Manage Kiosk
To Manage Kiosks you have to create a new kiosk and manage existing ones.
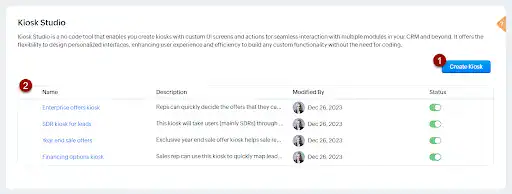
Setup > customization > Kiosk Studio
On this page, you will find the following:-
- Create Kiosks:- Create a new kiosk.
- Kiosk List:- This Kiosk list has all the existing kiosk lists with all the relevant details. This list will include all the existing kiosks, detailing information such as:
- Name: A name to identify the kiosk
- Description: A description of the kiosk
- Modified by: The user who made the last modification, along with the data and the time it was done, will be displayed. Additionally, it will show the user who created the kiosk and the date it was created.
- Status: Status can be categorized as either active, inactive, or draft. It is important to note that only a kiosk not linked to any home page, custom button, or setup page can be deactivated.
II. Start Kiosk Studio
- Now click on Setup> Customization> Kiosk Studio
- Click on the button Create Kiosk
- After that enter the Kiosk Name and Description
- In the Kiosk Studio, click the + icon and get started with building your kiosk.

It is important to note that the names of the various elements and screens will be referenced elsewhere in the kiosk. Therefore, these names must be unique.
5. You can try out your kiosk by clicking Test Run. This will run the set actions.
6. Click Publish after reviewing all your actions.
7. You can host your Kiosk on various pages, add it as a custom button, or directly from your CRM blueprint.
If you’ve linked your Kiosks to your CRM, you can see them in this pop-up.

Your kiosk is now set up and ready to use. Please place it in the locations you want your users to reach.
III. Associate Kiosk
A kiosk can be placed in various CRM locations. Here’s how to add them:
Home Page
- Visit the home page
- Choose the option for the home page you want to add the kiosk.
- Press the more (…) button and choose Add component.
- In the Add Component window, click Kiosk.
- Click Next
- In the Add Component window, type in the Component Name.
- Click Save.
Custom Buttons
- Navigate to Setup > Customization> Modules and Fields.
- Select the module for the kiosk’s location in the modules tab.
- Click the Links and Buttons tab
- Click +New Button
- On the Create Your Button page, type in the button’s name and what it does.
- Click next to use the Kiosk
- Include the users who require access to this kiosk.
- Click Save.
Setup Page
- Navigate to Setup.
- Tab the button Customize Setup.
- In the Setup Layout Editor, select Menu from a new or existing group by clicking + Menu.
- On the Menu Properties popup click the submenu name.
- Go to the dropdown list under the Source column and select Kiosk.
- Go to the link icon under the Action column.
- Click Done.
Canvas Record Detail Page
- In the Canvas Builder, choose the Data tab.
- On the Kiosk page, you’ll see a list of kiosks. Simply drag and drop a kiosk onto the canvas.
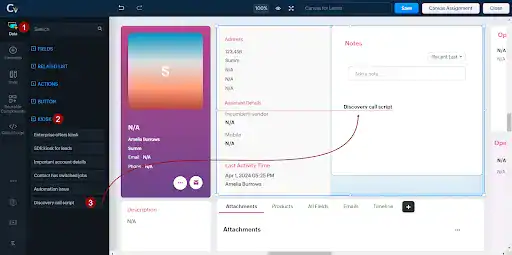
3. Now save it.
To edit a Kiosk
Go to Setup > customization > kiosk studio. Choose the kiosk you want to edit. In the Kiosk Studio, click edit, then make the changes you need. Finally, click publish.
To delete a Kiosk
Go to Setup > Customization > Kiosk Studio. Click the Kiosk you want to delete, then the Trash icon.
Conclusion
Integrating Zoho CRM with Kiosk Studio can transform how businesses interact with customers by creating seamless, automated experiences at every touchpoint. This blog’s guide helps you make a kiosk that’s both easy to use and attractive, improving customer service and making operations smoother. Kiosk Studio works for all types of businesses, making it simple to handle interactive kiosks and engage customers. With the right configuration, your kiosk can significantly increase customer happiness and help your business grow.
CRM Master’s Infotech is a trusted Zoho Implementation partner that helps businesses get the most out of Zoho CRM through tailored solutions and expert support.
Whether you need assistance with kiosk setup, CRM integration, or ongoing services, our team is here to ensure a smooth implementation that drives your business forward.